Photo Image Print System Plus User's Manual
Ver.1.1-1 2004/10/20
Copyright (C) SEIKO EPSON CORPORATION 2002-2012.
The source code for Photo Image Print System Plus is distributed under the GNU General Public License (COPYING), GNU Library General Public License (COPYING.LIB) and the EPSON KOWA Public Licence (COPYING.KOWA). The documentation is (in part) covered by the GNU Free Documentation License. All object code contained in the sources are Copyright SEIKO EPSON Corporation and are distributed under the terms of the EPSON KOWA Public Licence. For the exact terms please refer to the various COPYING files included.
Photo Image Print System Plus, using the LPRng print system, aims
to make printing under Linux simple and easy.
In addition, network-based remote printing is possible with a setup as illustrated below.

Photo Image Print System Plus is organised in the following
binary packages:
Contains those software components that are required by
most or all other packages.
Provides, amongst others, the pipsplus and pipsplus-admin
commands.
${printer_type} corresponds to the type of printer for
which the package is intended
For a laser printer you would need:
Includes the common part for a whole class of printers and allows several different printers (within that class) to be configured and used on your system at the same time.
${printer_name} indicates the printer model for which
the package is intended
So for an EPSON AcuLaser C900 you would need:
Includes the model specific parts needed to use your printer. You only need to install the driver package(s) for the printer(s) you have.
${gui_name} indicates the GUI toolkit used by the
utilities it provides
For utilities using GTK+ that would be:
Provides printer configuration and print utilities that
make using your printer easy.
Included are pipsplus-config and pipsplus-monitor.
LPRng
Note, you really should read the "Remote
Printing Remarks" before you start configuring the
software for network printing.
As an example, we will describe here how you can test your
remote print setup on Red Hat Linux 9.
We will assume that you have a default iptables based
firewall. The server uses an IP address of 192.168.1.1 and
the client 192.168.1.2.
Note, the above is only meant to test your network printing
setup. By no means does it imply to be a secure setup. You
should carefully consider the security implications yourself
and take whatever measures you deem necessary.
Use the rpm command to install the packages.
As an example, for an EPSON AcuLaser C900, installation would look
as follows:
Note, the version number may differ from that
used above.
This completes the installation of Photo Image Print System Plus
Note:Packages should be installed in the order listed below.
| pipsplus | ||
| | | ||
| +------> | pipsplus-${gui_name} | |
| | | ||
| +------> | pipsplus-epson-${printer_type} | |
| | | ||
| +----------------------------> | pipsplus-epson-${printer_name} |
Here we will illustrate the steps necessary to set up Photo Image Print System Plus on your system all the way to producing printed output using a simple example.
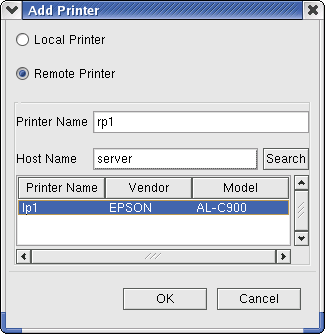
In order to use a printer in a networked environment, you first
need to configure the printer as a local printer on the print
server. After that, clients can configure it as a remote
printer.
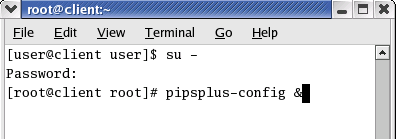
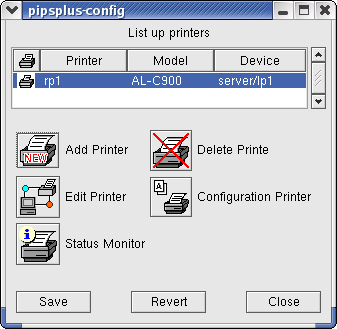
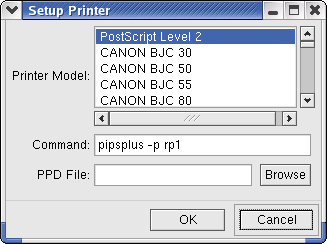
As root, run pipsplus-config
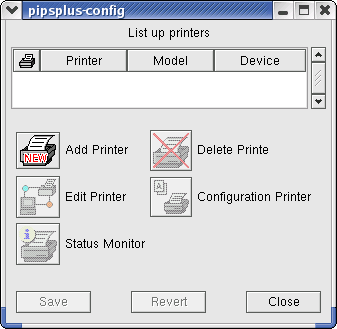
Select "Add Printer"
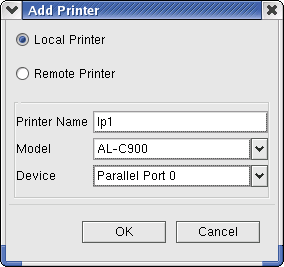
In case of a (server-side) local printer:
The pipsplusd daemon will be restarted automatically.
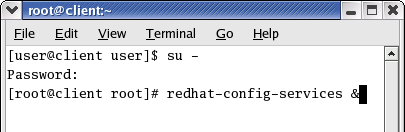
After the pipsplusd daemon has restarted, please restart the
lpd daemon.
For example, on Red Hat Linux 9, the lpd daemon can be
restarted (as root) with the redhat-config-services utility
and the like.
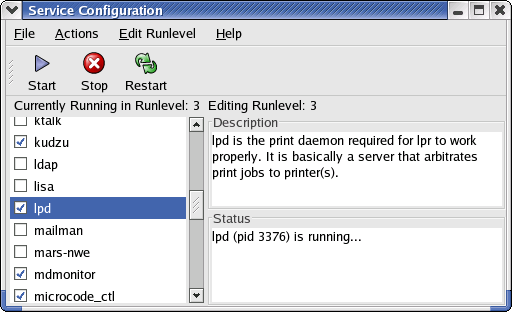
Execute redhat-config-services
Select lpd and "Restart" it.
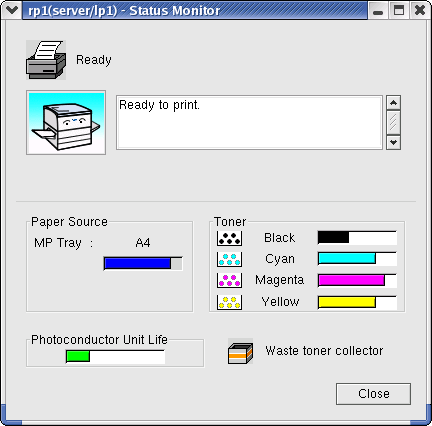
You can monitor the status of every printer you have configured.
As whatever user you like, execute the pipsplus-config command,
select the printer you want to monitor and start the "Status
Monitor".
After a little while the printer's status will be displayed.
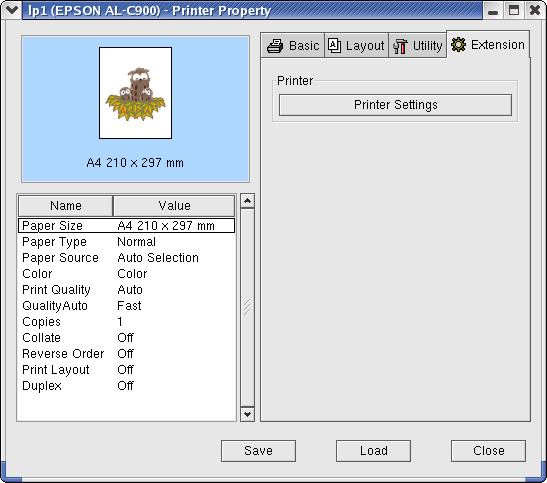
Via the pipsplus-config "Configuration Printer" menu, you can
configure the default options used when printing.
Set the "Basic" options.
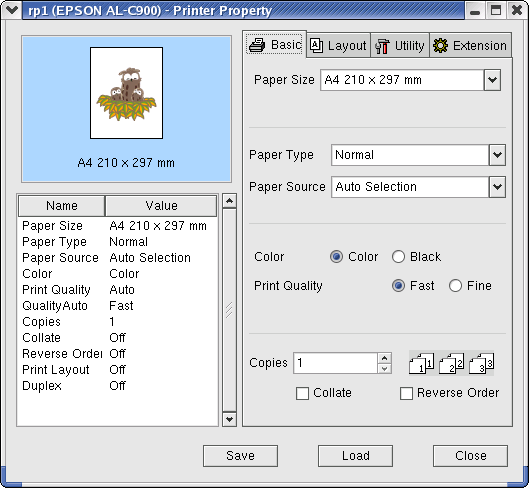
Set the "Layout" options.
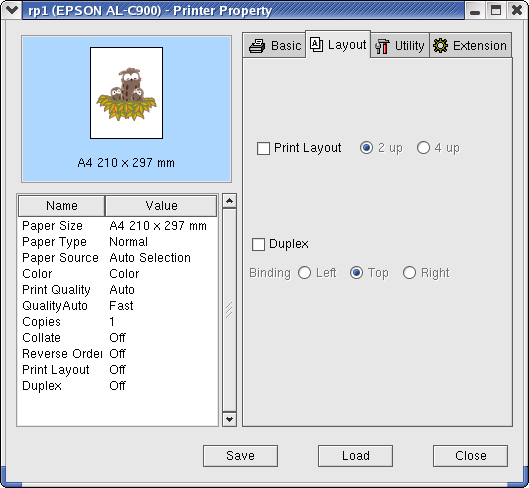
After you finished setting the default options, make sure you
"Save" them.
The options you have configured here will serve as the defaults
used by the pipsplus command.
Note: Options and values available may vary with printer model and
the version of the printer driver package used.
Note:
When you want to print from applications such as the GIMP, you can
use a print command such as "pipsplus -p rp1", where you specify
the printer via the -p option of the pipsplus command.
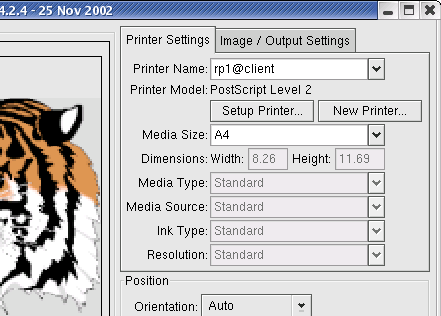
The application should then print using the option settings you
set (and saved!) via the pipsplus-config command as illustrated
before.
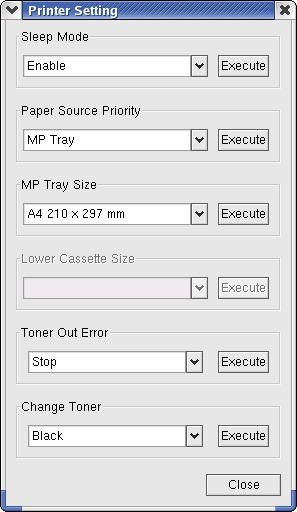
Note:
For activities such as setting the printer's suspend mode,
changing of the toner cartridge, start pipsplus-config and select
the "Printer Settings" menu on the "Extension" tab.
Note:
The Photo Image Print System Plus software contains the
following commands:
(included in the pipsplus package)
| pipsplus | printing front-end |
| pipsplus-admin | configuration command |
| pipsplusd | communication service/daemon |
| pipsplus-config | GUI-based configuration tool |
| pipsplus-monitor | GUI-based printer status monitor |
The following types of command-line options can be used:
| option type | example | explanation |
|---|---|---|
| short option without argument | -V | no argument should be given |
| long option without argument | --version | equivalent to corresponding short option |
| short option with argument | -p PRINTER | argument is required |
| long option with argument | --printer=PRINTER | equivalent to corresponding short option |
| short option with optional argument | -l[SECTION] | argument is not required |
| long option with optional argument | --list[=SECTION] | equivalent to corresponding short option |
Note:
When specifying an argument for a short option that optionally
takes an argument, do not separate the option from the
argument with a space. That is, use:
$ pipsplus-admin -lmodel
instead of:
$ pipsplus-admin -l model
Handles various document formats, including:
| short name | long name | description |
|---|---|---|
| -p PRINTER | --printer=PRINTER | sets the printer to use |
| -o KEY:VALUE | --option=KEY:VALUE | sets a print option |
| --mode=gtk | use the GTK-based GUI interface to set print options (requires pipsplus-gtk) | |
| --dump-printer | output print options on standard output | |
| -t FILE | --ticket=FILE | use the ticket specified |
| --dump-ticket | output the ticket on standard output | |
| (output control options) | ||
| -v[REPEAT] | --verbose[=REPEAT] | display more progress messages |
| -? | --help | display a summary of command-line options |
| --usage | display a short explanation on how to use the command | |
| -V | --version | display the command's version information |
Example
Note:
Although you specify all print options on the command-line via
the -o option, setting and saving your preferred settings in
advance makes the pipsplus command invocation a lot easier.
You will only need to override those settings that differ from
your saved preferences.
For details, see "pipsplus-admin".
Manipulates a wide variety of printer related settings.
Printer related settings can be divided in two basic groups:
those that define a printer to the system, and settings used
when printing with (one of) the defined printer(s).
The former are system settings so must be performed with root
privileges. The printer definitions are saved in
/etc/pipsplus/pipsplus.conf. If this file is changed, it is
necessary to restart lpd and pipsplusd.
The latter can be changed freely on a per user basis. With
root privileges these settings are saved under the
/etc/pipsplus/printers/ directory and become the system-wide
defaults. For normal users the settings are saved under the
$HOME/.pipsplus/printers/ directory. The file name for a
printer by the name of lp1 would be lp1.conf. These settings
(combined if both are present) become the default settings
from the next time you print via pipsplus.
| short option | long option | description |
|---|---|---|
| (action options) | ||
| -a | --add | adds a printer definition |
| -k | --delete | removes a printer definition |
| -e | --edit | changes a printer definition |
| -l[KEY] | --list[=KEY] | displays the information requested KEY |
| (KEYs that can be used with -l) | ||
| printer | displays printer definition information (default) | |
| model | displays available printer models | |
| device | displays available devices *1 | |
| (other options) | ||
| -p PRINTER | --printer=PRINTER | specifies the printer |
| -r HOSTNAME/PRINTER | --remote=HOSTNAME/PRINTER | specifies the remote printers host name and printer name |
| -o KEY:VALUE | --option=KEY:VALUE | sets option KEY to VALUE |
| (output control options) | ||
| -v[REPEAT] | --verbose[=REPEAT] | display more progress messages |
| -? | --help | display a summary of command-line options |
| --usage | display a short explanation on how to use the command | |
| -V | --version | display the command's version information |
Example
Note:
A GUI-based version of pipsplus-admin
Like pipsplus-admin, manipulates a wide variety of printer
related settings.
When executed with root permissions, all functionality can be
used.
When used by a normal user, printers can not be added, removed
or modified.
With the pipsplus-config command you can do the following:
Displays a printer's status
With the pipsplus-monitor command you can do the following:
| short option | long option | description |
|---|---|---|
| -p PRINTER | --printer=PRINTER | specifies the printer you want to monitor |
| (output control options) | ||
| -? | --help | display a summary of command-line options |
| --usage | display a short explanation on how to use the command | |
| -V | --version | display the command's version information |
Absolutely essential printer device communication server
This program runs as a daemon process on the system and takes
care of the communication between the Photo Image Print System
Plus utilities and your printer hardware. As all these
utilities use pipsplusd to access your printer(s), it must be
running at all times.
Note:
